Introduction

Introduction: Mapping Out a Plan for the Rest of My Life and Enjoying the Journey

My Golden Years are an extension of the life I have lived up to retirement which began on December 1, 2011. I have organized this blog to include the top ten relevant topics shown below in the right side column in General Topics. Just click on one and you will see all that I have written on that topic. Click on the Most Current tab for chronological order of all entries.

I have addressed each topic in no particular order other than what is currently on my mind on the day I am posting. I started each topic by describing where I was when I began this blog and then exploring the possibilities of progression and any goals that I would like to meet. After that, I write about the path to reach that goal as it happens. Sometimes I just write about what is happening now.

I welcome any comments and questions either on this blog or email as I travel these paths and hope to share my growth with interested persons who may find some common elements in their own path to the rest of their life. I hope to use my skills as an appraiser for nearly 30 years to continue to observe different perspectives on a subject and reconcile into a conclusion that is of value to me. Please join me whenever you like. Email notice of new posts is no longer available so just bookmark the address.

The Blog Archive tool is helpful to find posts by year. Of most importance to me is the confidence developed in my intuitive skills over the years and it is that part of my character I am trusting to define value in my life. I believe change can be good and I can be enriched by believing in my true self using my intuition. The analytical part of my life no longer has a financial grip and I can let go of what absolutely made sense at the time in favor of what feels right now. I have done a lot of work since this blog began in 2011 and I hope you will join me as I explore this approach in My Golden Years.


Pages

Friday, December 23, 2011

My Best Friend Daffney


Of all the pets we have had, Daffney was by far the sweetest member of our family.  Her mother, Sassy, was also sweet but with a large measure of sass, of course!  Sassy was only 17 months old when her firstborn, Daffney, arrived in Sarah's bedroom closet. Between the two of them, there were 23 puppies born.  So much joy in the house!  So many pictures in the photo albums.  So many good memories and fun!  We were blessed.

Sassy and Daffney were best friends until Sassy passed away October 2009 just a couple weeks short of her 15th birthday.  Daffney passed away a couple years later on December 3, 2011 at 15 years and 8 months.  It was good that Keith and I were able to spend all our time with each of them during their final days in our home.  It was a very, very sad time but peaceful and natural to be with our best friends to comfort them. 

In addition to all the wonderful photos of both Sassy and Daffney in our family albums, I have these most recent photos to share.  It is especially sad this Christmas as the nest is even more empty.  Before we had children, we had pets always around since our first year together in 1973.  This has also come at the time I retired and starting a different pace of life.  It will take some getting use too but I am optimistic that it will all work out in time naturally. It is the right time.  It will be sad for as long as it needs to be.  Both Sassy and Daffney will forever be in our hearts and we thank God for the time that we did have and the joy and friendship they brought into our lives.  This Spring, we will place their new blue stone memorials on their grave sites in our flower garden in our yard.  We will smile and remember them always.


Here we have Sassy and Daffney in their Happy Halloweenie costumes in 2008.


                                                             My sweet foot warmers!


Here is Sassy about 6 weeks before she passed away in October 2009.  She had heart issues.


These three photos above were taken in October 2010.  Daffney proved to be a good companion out in public and we began to take her everywhere with us.  After her mother died, we could no longer leave her alone for long.


This would be Daffney's last winter experience after a blizzard in early 2011. I don't think she wanted to go through another one like that!


This photo was taken just after Daffney's yearly physical on June 21, 2011.  The Veterinarian said said she was very healthy for her age just two months after her 15th birthday!  She was slowing down a bit and her eyes weren't clear but she was happy and got around well enough.  She still would walk with what I called a "hoppity-skip" once in awhile.  She did this when she was full of joy!


These three photos above taken in September 2011 show Daffney with Keith and I when we visited the recently flooded areas near Whiting, Iowa where Keith has family.  Daffney traveled very well!  We loved having her with us and she was no problem at all.  So we decided she could do well to be with us again on our yearly Hot Springs, Arkansas vacation in late October.  This was her second time to Hot Springs and her last trip together with us. 


The above photos were taken on a walk around Garvan Woodland Gardens near Hot Springs, Arkansas.  We carried Daffney most of the time but she never passed up an opportunity to drink water even when she had to share it with the fishes!  The profile photo was the last one taken as she passed away 6 weeks later at home.  She had stopped eating a couple days and on December 1st, we took her to the Veterinarian who took X-rays and blood tests and gave us the sad news that Daffney was in her final days.  Her kidneys were failing.  We brought her home and stayed with her all the time.  Two days later she passed away while we watched "A Wonderful Life" on TV. 


The next day we buried her in our backyard and will plant flowers next Spring.  Sassy's grave is a few feet away.  I went online and found just the right blue stone memorials custom made from Adirondack Stone Works at www.petmemorial.net located in New York.  Sassy was always known as our lap dog as she would insist on sitting in your chair and even scoot you over to squeeze in on the left side.  Then she would nudge your hand to pet her head while she was awake. Daffney was a foot dog.  She always liked best to be at your feet and lay her head upon them.  She would lean into any neck scratches done with your feet.  On the memorials I had engraved for Sassy, "Forever in our hearts...now in God's lap."  For Daffney I had engraved, "Forever in our hearts...now at God's feet."  It will be a quiet Christmas full of love and good memories.

Tuesday, December 20, 2011

Remodeling Lower Level - Painting

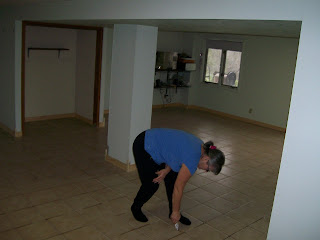
Painting began on my first day of retirement on December 1, 2011.  It was also the day that Keith and I took our Dachshund, Daffney, to the vet first thing because she had stopped eating a couple days.  Sadly we were told she was in her end days and we took her home where she can be most comfortable in familiar surroundings and both of us attentive to her needs.  Fortunately, I had all my painting supplies ready to go and the first day went slow as I checked on Daffney off and on.  It was good to stay busy and yet be close.  Daffney passed away three days later and the painting was good therapy and lasted two weeks.  Sometimes the cloth I used to wipe my tears was also the cloth I used to wipe paint smudges so looking in the mirror made me smile once in awhile as I moved forward.

The paint I choose was from Valspar with a one-coat eggshell finish.  The three colors are Canyon Earth, Wool Coat, and Warm Buff. 


Here you can see the colors with Warm Buff inside the closet and under the archway, Canyon Earth on the archway and the wall with the sliding glass door.  Wool Coat is on the wall with the water distiller.

Shortly after I finished all the painting, we noticed how the suspended ceiling looked sagging.  We had replaced about a half dozen ceiling tiles earlier because they were off-colored and slightly stained.  We thought that would be enough.  After the new floor and paint, we decided to tear out the whole ceiling and replace all the tiles and added more brackets for additional support.  Of course, in the process, there was a huge mess to clean up and some touch-up painting afterwards.


The spots on all the photos are from my camera...not on the walls!  Here you can see the dust created from removing the old ceiling.  We already completed the side of the room in the picture and the mess is from the other side.  So I had a big cleaning job!  Luckily, all it took was wiping the dust off the walls and letting it all settle for the shop-vac to suck-up. 

Here's the finished cleaned-up room with some spots still on my camera:


View from end of room by the distiller looking toward the wall that separates the unfinished room with the wood stove and furnace.  The fan will help heat the newly remodeled room.


View from the corner that will be the bedroom looking toward the sliding glass doors in the family room.  This bedroom area will soon be blocked off with storage shelves as partitions.


View from the family room looking under the archway with the stairs going tto the upper floor on the right and the door to the bathroom and unfinished area on the left.


View of the bedroom area from the family room under the archway.  This view will soon be blocked with storage shelves and a curtain doorway on the right.


View of the stairwell from the bedroom area.  This will be soon be blocked by storage shelves and the freezer.  The shelves facing the bedroon will be a closet unit and bookcases.  They will be back-to-back with storage shelves used as pantry with doors facing the stairs.  There will also be a curtain doorway.


View from the stairwell looking across the room to the distiller corner.  This will be blocked with storage shelves soon.  There will be a large hallway from the stairs to the family room.


This is the bedroom area as seen from the stairwell.  We left the overhead light out in that corner because the lighting will come from several lamps.  This will allow the bedroom to be dark if the rest of the room is lighted.  The overhead light in the photo will be over the storage cabinets and hallway.


We have added a wool rug recently and will move in  the bedroom set from upstairs soon.  This will include a nightstand, rolltop desk, and a hutch/dresser.  The closet on the right will open halfway into the bedroom and halfway into the family room.  There will be a heavy curtain separating the two rooms.  This will allow the curtain to be drawn for privacy or open to watch TV and/or get natural light.  The closet is for file storage as my work requires 5-7 years retainment; later it will be additional storage of seasonal clothing.


A beautiful wool rug!  Too bad the bed will cover up most of it!  I have made arrangements with a couple young men in town to help us move everything out of the storage unit tomorrow.  They did a good job six months ago when we moved it all out to begin the remodeling project in June.  We will put all the plastic containers back in the corner near the wall fan until we clean-up, paint, and add 3-tiered rack shelving to the other side of the lower level.  That should take up a whole wall and keep everything off the floor.  The remaining project is removing the wallpaper and painting the bathroom in the lower level.  I will start today.

Sunday, November 13, 2011

Remodeling Lower Level - Flooring

Shortly after we moved in this house in Hermitage in 1986, we remodeled the lower level for my use as a Home Office and a multi-purpose Family Room.  I designated half of the 700 square feet finished area as my office and used that area for tax deductions.  The rest was used as a TV room, play area for the kids and their friends, computer area, raising puppies, sewing and craft projects, extra sleeping area for guests, exercise machines and storm shelter.  The other 700 square feet still remains basically unfinished except we insulated the walls and painted it.  This area has the wood stove, electric furnace, storage and shop area.  It all has served us well for 25 years. 

We began the second remodel in June 2011 by removing the old rug.  It was a good quality indoor-outdoor rug that we had glued to the concrete.  This was a quick fix for a concrete floor that was not level.  Now we will do it right.


The machine is called The Rip Stripper and was rented at Superior Rentals in Bolivar.  Keith had started an area using the tool on the left that we had purchased years ago to remove roof shingles.  Too much work for a large area!


The Rip Stripper works very well leaving only the hard dried-on rug glue.


With a utility knife, we would cut away the detached rug pieces when it got too large and heavy.


The old rug pieces were easily carried out to the burn area established behind the Russian Olive bushes at the edge of our yard.  It was so good to see that 25 year old rug burn!

Now came the nasty work...removing the old dried-on glue from the concrete.


This time we found the right machine at another rental place in Springfield.  Keith chose this grinder because it had a better way of collecting the dust.  It was still dusty but could have been worse. 


The white part in the photo is the clean surface of the concrete. 


It was also a great time to invest in a Shop-Vac.  It will come in handy also for drywall sanding clean-up, wood ashes and many uses in the shop area.  We already had a good electric cement mixer that proved to be essential.

At this point we had some decisions to make.  We initially intended to resurface this clean concrete and level it to the degree that we could do an acid-stain and then seal it.  It seemed like the least expensive and easiest way to go.  By the time the floor was leveled with a special concrete mix, it was not the all-over clean white surface we started with after grinding.  We could see that the acid-stain may not turn out the way we liked and then we would have done a lot of work for something that did not please us.  Maybe we could have re-ground the new leveled surface, but that would be an added expense and more mess.  We let the leveled new concrete set for awhile and went on a trip to Iowa in September.  We didn't do any work in September on the floor.  We did a lot of thinking and talking.


This job took much more time and effort and special leveling concrete mix than we expected.  The floor should be no more than 1/10" off level every 10 feet.  This leveling concrete was applied once all over and then again in most places to get the desired results.  Maybe the acid-stain would have been effective but we could not find any verification online or talking to experts that we would get the desired affect on this leveling concrete mix which has polymers in it.  Acid-stain is typically done on new concrete surfaces.  We finally decided to go with a modestly-priced tile and be done with it. 

Keith went shopping at Lowe's and found that he could afford the beautiful Italian-made porcelain ceramic tile that was on sale!  This was totally unexpected as we were going to settle for something much less.  Due to the poor economic times for new construction, this high-end product was available at an affordable price.   Lucky us!


Rialto Beige Porcelain Ceramic Tile made in Italy


Setting the tile in mortar using spacers in between.


At this point, it is all coming together and looking worth the effort!


Now came the part where we mess it all up with the grout!  It took so many buckets of clean water and over and over mopping to get it looking good again.


Finally, by mid-November, it was time to seal the grout...twice over.  There's a handy little applicator that worked much better than the small paint brush I started out with.  The plastic refillable bottle has a screw-on top with a little brush that fits perfectly between the tiles.  While I did the sealing, Keith got most of the baseboards cut and nailed up.  The next phase of the lower-level remodeling will be wall repair and new paint.  It all looks better already!

Sunday, November 6, 2011

Exercise - The Dam Trail

This past year, one of my favorite trails to walk is on the Pomme de Terre Lake Healthy Active Community Running River Trail.  I like to call it The Dam Trail for short. 

 http://www.nwk.usace.army.mil/pt/Trails.cfm 

My brother usually comes to visit me in Missouri from Iowa each spring.  This last spring I showed him the new changes happening at our nearby Lake Pomme de Terre dam getting refurbished for the 50th anniversary of its construction.  These photos show the Outlet Area just below the dam.


 Also new this year are some changes to The Harbor floating restaurant on the other side of the dam.  A very nice covered patio was built and each weekend during the season there is live music played outside.  The best part is just sitting outside and enjoying the evening with good friends and family.  They serve excellent food and drinks. 


Below are some recent photos taken in the fall below the dam and along the trail.


This photo shows the outlet area complete with new railings.  I'm looking forward to fishing from this site next spring.


Had to include a photo of my new 2011 Chevy Impala with the dam in the background.


Here I am at the end of the trail...and it was a Happy Trail!