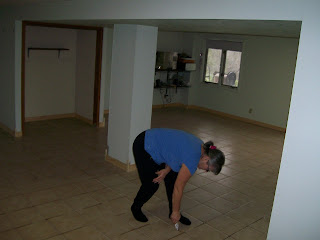
We began the second remodel in June 2011 by removing the old rug. It was a good quality indoor-outdoor rug that we had glued to the concrete. This was a quick fix for a concrete floor that was not level. Now we will do it right.
The machine is called The Rip Stripper and was rented at Superior Rentals in Bolivar. Keith had started an area using the tool on the left that we had purchased years ago to remove roof shingles. Too much work for a large area!
The Rip Stripper works very well leaving only the hard dried-on rug glue.
With a utility knife, we would cut away the detached rug pieces when it got too large and heavy.
The old rug pieces were easily carried out to the burn area established behind the Russian Olive bushes at the edge of our yard. It was so good to see that 25 year old rug burn!
Now came the nasty work...removing the old dried-on glue from the concrete.
This time we found the right machine at another rental place in Springfield. Keith chose this grinder because it had a better way of collecting the dust. It was still dusty but could have been worse.
The white part in the photo is the clean surface of the concrete.
At this point we had some decisions to make. We initially intended to resurface this clean concrete and level it to the degree that we could do an acid-stain and then seal it. It seemed like the least expensive and easiest way to go. By the time the floor was leveled with a special concrete mix, it was not the all-over clean white surface we started with after grinding. We could see that the acid-stain may not turn out the way we liked and then we would have done a lot of work for something that did not please us. Maybe we could have re-ground the new leveled surface, but that would be an added expense and more mess. We let the leveled new concrete set for awhile and went on a trip to Iowa in September. We didn't do any work in September on the floor. We did a lot of thinking and talking.
This job took much more time and effort and special leveling concrete mix than we expected. The floor should be no more than 1/10" off level every 10 feet. This leveling concrete was applied once all over and then again in most places to get the desired results. Maybe the acid-stain would have been effective but we could not find any verification online or talking to experts that we would get the desired affect on this leveling concrete mix which has polymers in it. Acid-stain is typically done on new concrete surfaces. We finally decided to go with a modestly-priced tile and be done with it.
Keith went shopping at Lowe's and found that he could afford the beautiful Italian-made porcelain ceramic tile that was on sale! This was totally unexpected as we were going to settle for something much less. Due to the poor economic times for new construction, this high-end product was available at an affordable price. Lucky us!
Rialto Beige Porcelain Ceramic Tile made in Italy
Setting the tile in mortar using spacers in between.
At this point, it is all coming together and looking worth the effort!
Now came the part where we mess it all up with the grout! It took so many buckets of clean water and over and over mopping to get it looking good again.
Finally, by mid-November, it was time to seal the grout...twice over. There's a handy little applicator that worked much better than the small paint brush I started out with. The plastic refillable bottle has a screw-on top with a little brush that fits perfectly between the tiles. While I did the sealing, Keith got most of the baseboards cut and nailed up. The next phase of the lower-level remodeling will be wall repair and new paint. It all looks better already!


I read this post, your post is so nice, knowledgeable, and very informative for us about home renovate flooring. Thank you for sharing this post. renovate house flooring
ReplyDelete